

Some of the best things on our tree cost about forty cents to make and took a kid under an hour. These six diy christmas ornaments are the ones I keep coming back to — no fancy tools, no complicated patterns, and every one of them ends up being a keepsake somebody asks about years later.
Salt Dough Shapes You’ll Still Be Hanging in Ten Years
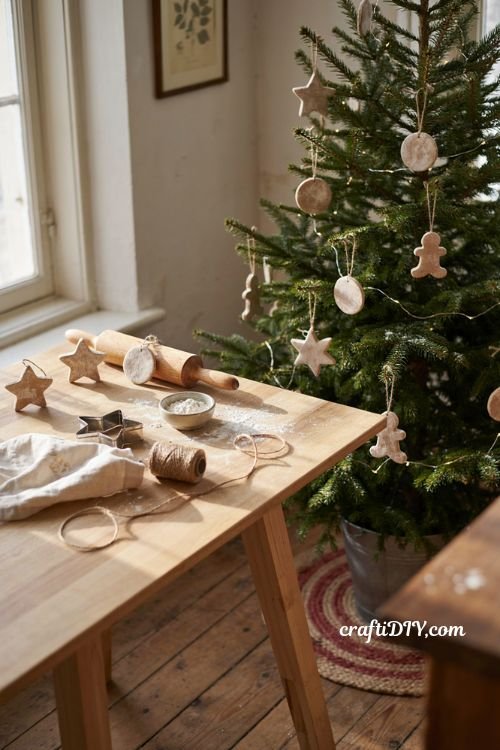
This is the project I’d start with if you’ve never made an ornament before. The dough handles like sugar cookie dough, so kids take to it immediately, and the finished shapes last decades if you seal them properly.
What you’ll need:
- 2 cups all-purpose flour
- 1 cup table salt
- 1 cup warm water
- Cookie cutters
- A drinking straw
- Acrylic paint and a clear sealer
Steps:
- Mix the flour and salt, then add water slowly until the dough pulls together into a ball. It should feel like play dough, not sticky.
- Knead it on a floured counter for about five minutes. This part matters — under-kneaded dough cracks in the oven.
- Roll to a quarter inch thick and press your cutters in. Thicker than that and the centers won’t dry.
- Punch a hanging hole near the top with a straw, not a skewer. Skewer holes close up as the dough shrinks.
- Bake at 200°F for two to three hours, flipping once halfway, until they feel hard all the way through.
- Cool completely, paint, then seal both front and back.
Tip: Stick to stars, circles, and gingerbread shapes. Anything with thin points — snowflakes especially — snaps off the first time you pack them away.
Marbled Shaving Cream Ornaments
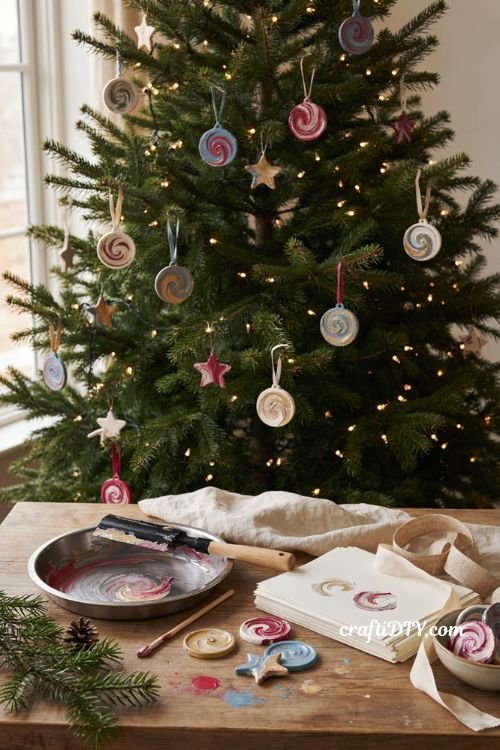
Messy, and genuinely magical when you scrape the foam off and see the pattern underneath. I’ve watched kids gasp at this one. Adults too, honestly.
What you’ll need:
- Plain white shaving cream (not gel)
- Liquid watercolors or food coloring
- A shallow baking pan
- Thick white cardstock
- A skewer or chopstick
- A squeegee or old credit card
Steps:
- Spray a flat layer of shaving cream into the pan, about an inch deep, and smooth the top.
- Drip a few drops of two or three colors across the surface. Don’t overdo it — too many colors turn muddy fast.
- Swirl gently with the skewer. Three or four passes is plenty.
- Lay a piece of cardstock face down on the foam, press lightly, and lift it straight up.
- Let it sit for about thirty seconds, then scrape the foam off with the squeegee in one steady motion. That’s the reveal.
- Once dry, cut into circles or stars, punch a hole, and thread ribbon through.
Watch out: Gel shaving cream won’t hold the pattern. It has to be the cheap foaming kind from the dollar store.
Mini Snow Globe Ornaments

Fillable plastic ornament shells cost a couple dollars for a pack, and what goes inside is entirely up to whoever’s making it. Small LEGO builds, a tiny figure, a sprig of faux greenery — all of it works.
What you’ll need:
- Clear fillable plastic ornaments that split in half
- Fake snow or fine white glitter
- A small figure, LEGO build, or trinket
- Hot glue
- Ribbon
Steps:
- Pull the two halves apart and set the hanging cap aside.
- Glue your figure to the inside bottom of one half so it doesn’t tumble around.
- Add a spoonful of fake snow. Less than you think — a packed globe hides everything inside it.
- Press the halves together and snap the cap back on.
- Run a thin bead of hot glue around the seam if you want it sealed for good, then tie on ribbon.
Tip: Let kids build their LEGO figure first, before anyone touches the glue. Trying to design and assemble at the same time is where the frustration starts.
Dried Orange Slice Ornaments

Half the appeal here is the smell. Your kitchen goes warm and citrusy for a few hours, and the finished slices glow when the tree lights hit them from behind.
What you’ll need:
- 3 oranges
- Parchment paper and a baking sheet
- Paper towels
- Twine
- Whole cloves or cinnamon sticks (optional)
Steps:
- Slice the oranges about a quarter inch thick. Thinner slices curl; thicker ones take forever.
- Blot both sides firmly with paper towels — this cuts drying time nearly in half.
- Lay them flat on parchment and bake at 200°F for two to three hours, flipping every hour.
- They’ll feel slightly tacky coming out and firm up as they cool. Pulling them early tears the rind.
- Thread twine through the peel near the top, knot a loop, and hang.
Tip: Press a few cloves into the white pith before baking. They hold the scent longer than the orange alone does.
Yarn-Wrapped Cardboard Stars

A cereal box and leftover yarn, and you’ve got something that looks like it came from a Scandinavian shop. Chunky wool gives the softest finish.
What you’ll need:
- Stiff cardboard
- A craft knife
- Yarn in one or two colors
- Hot glue gun
Steps:
- Draw a five-point star on the cardboard and cut it out. Fat points are much easier to wrap than skinny ones.
- Glue the yarn end to the back, then start wrapping across the star’s body.
- When you reach a point, put a dab of glue right at the tip and wrap tighter there than elsewhere.
- Keep going until no cardboard shows through, overlapping as needed.
- Glue the tail down on the back and attach a yarn loop to one point.
Watch out: Loose wrapping at the points is the one thing that makes these look unfinished. Slow down for those five spots and the rest takes care of itself.
Twine-Wrapped Cookie Cutters
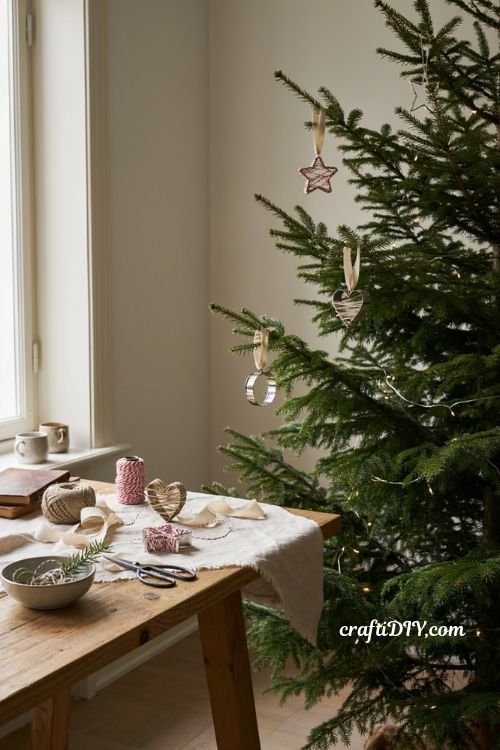
If you own cookie cutters, this is a ten-minute ornament. It also doubles as a gift topper, which means the person opening the present gets something they can hang the same night.
What you’ll need:
- Metal cookie cutters
- Baker’s twine or jute
- Hot glue
- Ribbon
Steps:
- Glue the twine end to the inside edge of the cutter where it won’t show.
- Wrap around the metal, keeping each pass snug against the last so no gaps open up.
- If your twine is thin, wrap two strands at once. It goes twice as fast and looks fuller.
- Work slowly around inside corners — that’s where the twine wants to slide.
- Tuck the end under the final loops and add a ribbon for hanging.
Tip: Red and white striped twine on a plain star cutter reads Christmas instantly, without a single other embellishment.
Start with the orange slices if you want something going in the next twenty minutes, or the salt dough if there’s a kid in the house who needs a project. Either way, write the year somewhere on the back before you pack them away — you’ll be glad you did when you’re unpacking the box five Decembers from now. And if yours come out crooked or the paint goes streaky, hang them anyway. Those are always the ones people notice. Send me a photo if you make any of these; I love seeing what people change.