
Every September I drag the same tired bin out of the closet, and every September I think: I could just make something better. Turns out most of the easy fall decorations DIY crowd swears by cost under ten dollars and use stuff already sitting in your yard or your junk drawer. Here are six I come back to year after year, all beginner-friendly, all done in an afternoon.
Pressed Leaf Frames for a Blank Hallway Wall
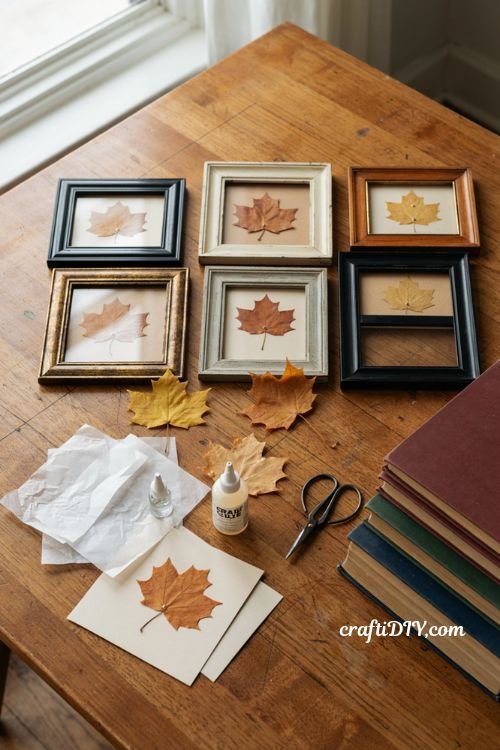
There’s a stretch of wall between my kitchen and back door that stays empty eleven months a year. In October it gets six thrifted frames with pressed maple leaves in them, and honestly it’s the thing guests comment on most. Costs almost nothing if you already own the frames.
What you’ll need:
- Freshly fallen leaves (bright ones, not crispy brown)
- Wax paper
- A few heavy books
- Cream or tan cardstock
- Picture frames, any size mix
- Clear-drying craft glue
Steps:
- Collect leaves that are still a little flexible. Ones that crackle when you bend them will shatter later.
- Wipe off dirt, then sandwich each leaf between two sheets of wax paper.
- Stack the books on top and leave it alone for four or five days. Longer is fine.
- Cut cardstock to fit your frames, then arrange the pressed leaves before gluing anything down.
- Dab a tiny bit of glue on the leaf’s stem and center vein only — glue on the edges makes them curl.
- Frame them and hang in a loose grid. Uneven spacing looks intentional; perfectly even spacing looks like a dentist’s office.
Tip: Skip the deep reds if your walls are dark. Yellows and oranges show up from across the room.
Twine-Wrapped Acorn Squash That Look Like Giant Acorns
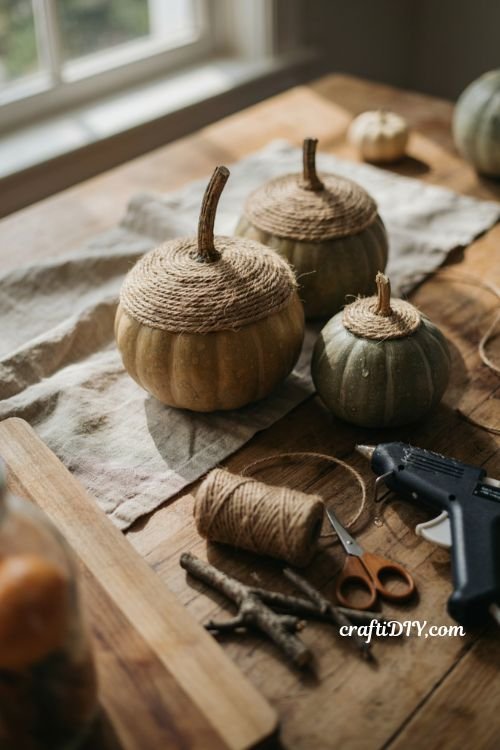
This one takes about ten minutes and gets the biggest reaction of anything on my mantel. Grocery store acorn squash already have the shape — you’re just adding the cap.
What you’ll need:
- 3 acorn squash, different sizes
- Natural jute twine
- Hot glue gun
- A short twig for each squash
Steps:
- Wash and dry the squash completely. Hot glue won’t stick to a damp rind.
- Start at the very top of one squash and glue down the end of the twine in a tight coil.
- Wrap outward in a spiral, adding a dab of glue every inch or so, until the “cap” covers the top third.
- Snip the twine and tuck the end under the last loop.
- Glue a twig upright in the center for the stem.
Watch out: Don’t wrap too far down the sides. Once the twine passes the squash’s widest point it stops reading as an acorn and starts looking like a wrapped squash.
No-Sew Fabric Pumpkins From an Old Sweater
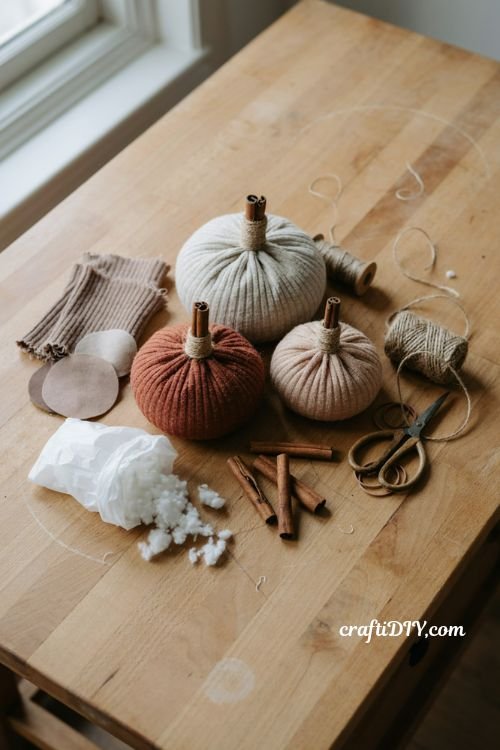
If you own a sweater with a hole in the elbow, you own three pumpkins. No sewing machine, no pattern, no measuring.
What you’ll need:
- An old sweater or a half yard of scrap fabric
- Fiberfill, or plastic grocery bags
- Twine or strong thread
- A cinnamon stick per pumpkin
- Rubber band
Steps:
- Cut a rough circle from the fabric, roughly twice as wide as you want the finished pumpkin.
- Pile stuffing in the center, then gather the edges up like a drawstring bag.
- Cinch the top with a rubber band and squash the whole thing down with your palm — pumpkins are wide, not tall.
- Wrap twine around the body from top to bottom, four or five times, pulling snug to make the ridges.
- Push a cinnamon stick into the gathered top to hide the rubber band.
Tip: Ribbed sweater knit gives you texture for free. Smooth cotton needs tighter twine wraps to look pumpkin-shaped at all.
Dried Orange and Paper Leaf Garland
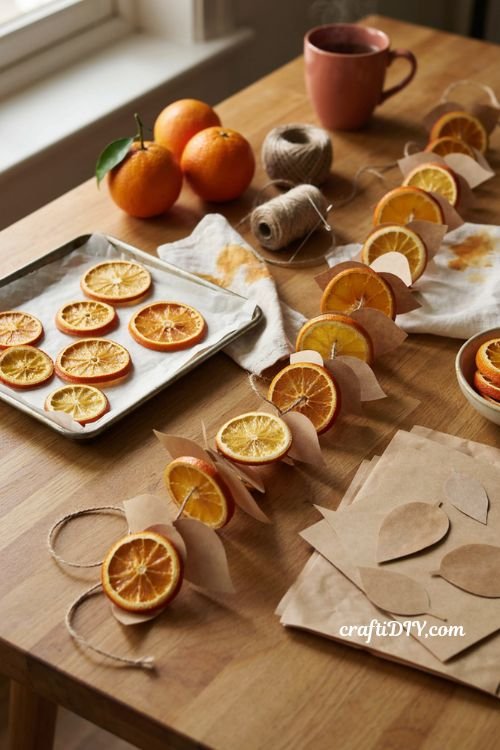
Half the reason to make this is the smell. Your whole kitchen goes warm and citrusy while the oranges dry, and the finished garland holds up from September clear through Thanksgiving.
What you’ll need:
- 3 oranges
- Parchment paper and a baking sheet
- Kraft paper or brown grocery bags
- Baker’s twine
- Embroidery needle
Steps:
- Slice the oranges about a quarter inch thick. Thinner slices dry faster but tear easily.
- Blot both sides hard with paper towels — this cuts drying time almost in half.
- Lay them on parchment and bake at 200°F for two to three hours, flipping once an hour.
- While they dry, cut leaf shapes from the kraft paper. Freehand is fine; real leaves aren’t symmetrical either.
- Thread the needle and string the slices and paper leaves alternately, spacing them a few inches apart.
Watch out: They’ll feel slightly tacky right out of the oven and firm up as they cool. Pulling them off too early tears the rind.
Punched Tin Can Votives for the Porch Steps
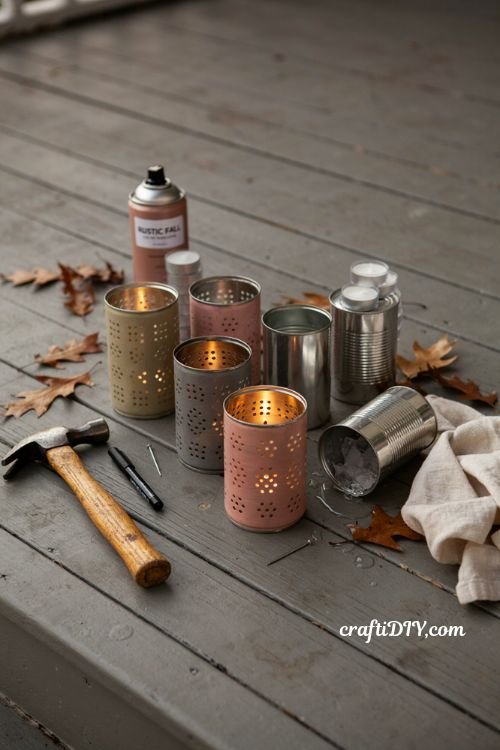
Soup cans, a hammer, and a nail. That’s the whole supply list, and the little pinpricks of light on a dark porch look far more expensive than they are.
What you’ll need:
- Empty tin cans, labels soaked off
- A hammer and a thin nail
- A marker
- Spray paint in a muted color
- Tea lights
Steps:
- Fill each can with water and freeze overnight. The ice keeps the can from denting when you hammer.
- Draw your pattern on the outside with a marker — simple dot shapes work better than letters.
- Set the frozen can on a folded towel and tap the nail through at each dot. Steady taps, not one hard swing.
- Let the ice melt, dry the can fully, then spray paint the outside.
- Drop in a tea light and line them up your steps.
Tip: Spray the inside gold if you have it. The light bounces around and glows through the holes instead of just pinpointing out.
Mini Pumpkin Planters With Succulents
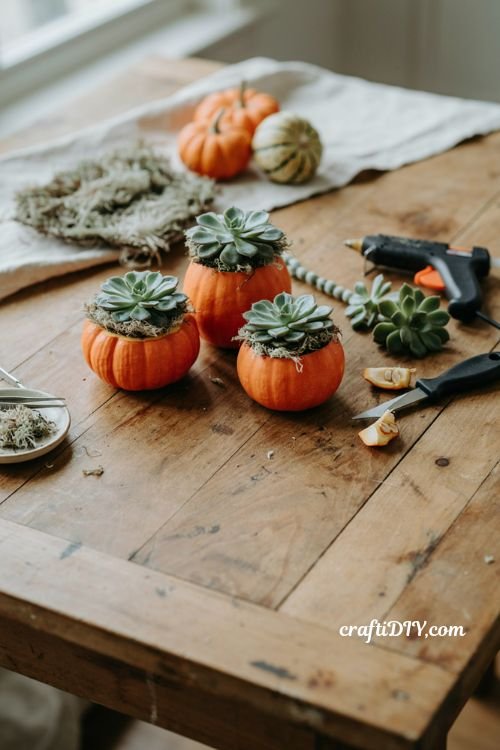
Last one, and it’s the one people always ask about. A mini pumpkin holds a succulent arrangement for six to eight weeks without any soil at all.
What you’ll need:
- Mini pumpkins or small gourds
- Sheet moss
- Succulent cuttings
- Hot glue gun
- Craft knife
Steps:
- Cut a shallow opening in the top of the pumpkin, about two inches across. Don’t hollow it out.
- Scoop out just enough flesh to sit the moss in.
- Glue a pad of sheet moss over the opening — the glue cools fast and won’t hurt the cuttings.
- Press succulent cuttings into the moss, biggest first, then fill gaps with smaller rosettes.
- Mist the moss lightly once a week. That’s all the water they need.
Watch out: Keep these indoors or on a covered porch. One hard rain and the pumpkin starts to soften underneath.
Start with the fabric pumpkins if you’ve only got an hour — they’re forgiving and you’ll have something on the mantel tonight. And if your first pressed leaf tears in half or your twine cap goes lopsided, that’s genuinely fine. Mine did too, the first three times. Snap a photo of whatever you end up with and tag it; I love seeing which ones people change up.
2 thoughts on “Easy Fall Decorations DIY: 6 Cozy Projects You Can Make This Weekend”