
Paper butterflies seem like they should be easy, and then you fold your first one and it looks more like a paper airplane had a rough week. Honestly, the trick isn’t skill — it’s picking the right technique for the shape you’re going for. Once you know which fold or cut does what, these come together fast, and they’re genuinely satisfying to make in a batch.
Easy Pink Glitter Butterfly Tutorial
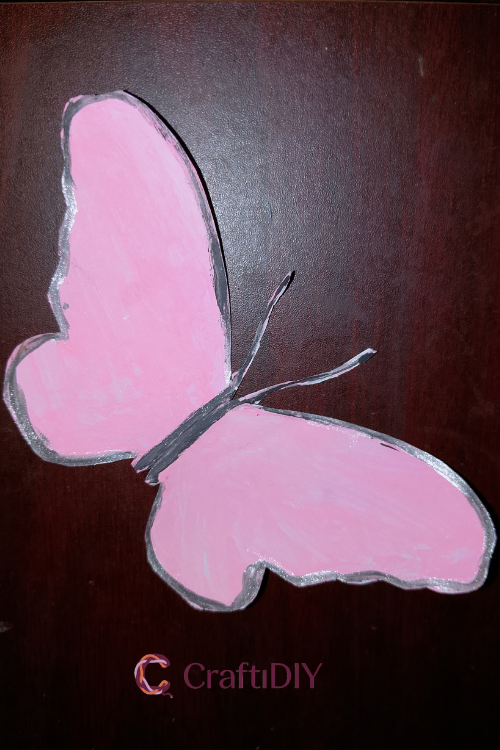
Fold, cut, unfold. That’s all it takes to get two matching wings from one sheet of paper. This paper butterfly craft is honestly beginner-proof, and the pink paint and silver sparkle make it look fancier than it is.
A Pink Watercolor Butterfly with Silver Glitter Edges
You only draw one wing, and the fold does the rest.
What you’ll need: white paper, pencil, scissors, Black and pink tempera color, Silver Glitter Tempera Color.
Steps:
- Draw half a butterfly wing in pencil.
- Fold the paper in half.
- Cut along the pencil line while it’s still folded.
- Unfold it. Symmetrical butterfly, no measuring.
- Paint the whole thing pink tempera color.
- Let it dry [CHECK: drying time].
- Trace the border with the Black tempera color.
- Add silver glitter for the sparkle.
Tip: Don’t unfold early. Cutting both layers at once is what keeps the wings matching.
Not into pink? Swap in any shade from the paint set and keep the black border.
Make one, then try a second in another color. Pin your favorite and see which looks best on a window.
Simple Symmetrical Cutout Butterflies
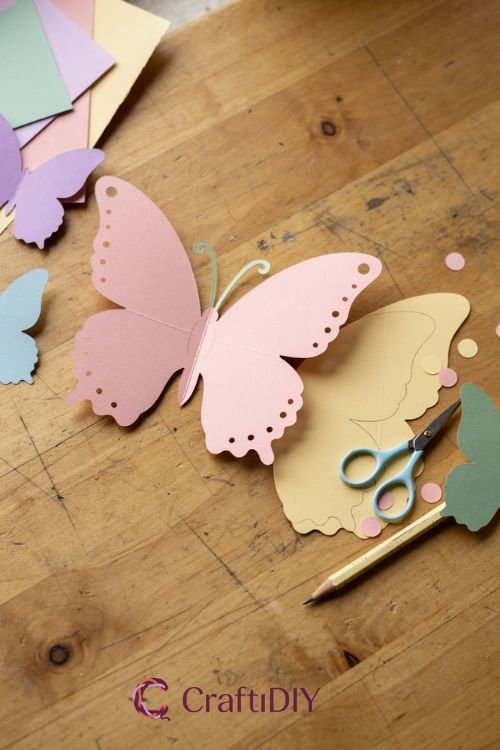
This is the one to start with if you’ve never made a paper butterfly before, and it’s basically foolproof once you get the fold-and-cut logic down.
What you’ll need:
- Colored cardstock or scrapbook paper
- Pencil
- Scissors
- Optional: hole punch for dot patterns
Steps:
- Fold your paper in half.
- On the folded edge, sketch half a butterfly shape — one wing, half the body, running right along the fold line.
- Cut along your pencil line, keeping the fold intact where the body meets it.
- Unfold. You’ll have a perfectly symmetrical butterfly, even if your original sketch was a little wobbly.
- Add antennae by cutting two thin curved strips separately and gluing them to the head.
- Punch small dots or cut simple shapes into the wings for pattern.
- Flatten it under a book for a few minutes if the fold won’t sit right.
Tip: Don’t try to cut delicate details on your first pass — cut the basic wing shape first, unfold to check it’s even, then go back in for the smaller cutouts.
A Watercolor-Wash Butterfly, Painted Before You Cut
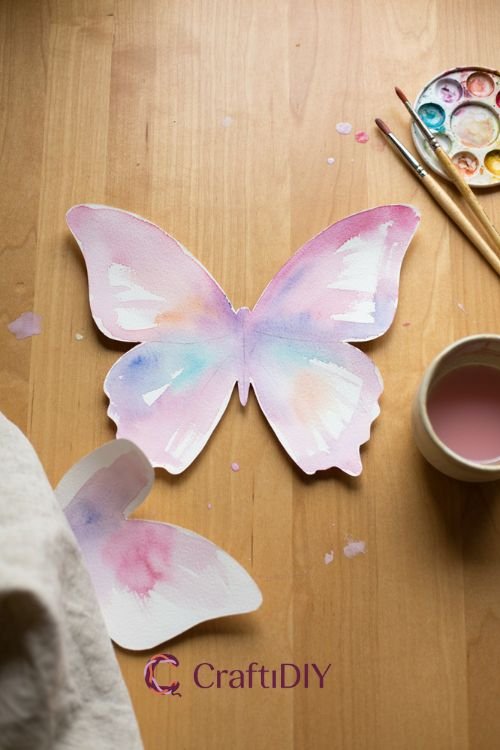
This one flips the usual order — you paint first, let it dry completely, then cut the shape out of the painted sheet. It gives you these soft, blended wings that look nothing like a flat marker coloring job.
Grab a sheet of watercolor paper, your paints, and a butterfly template (or just wing shapes you’ve sketched loosely). Wet the paper first, then drop in two or three colors and let them bleed into each other — don’t overthink the blending, the water does the work. First time I tried this, I painted the whole sheet one solid color and it came out looking more like a leaf than a butterfly, so let a little white paper show through in spots. Once it’s bone dry, fold it, trace your template on the back, and cut. The mirrored bleed pattern on both wings is the part that makes people ask how you did it.
Layered 3D Butterflies for Cards and Walls
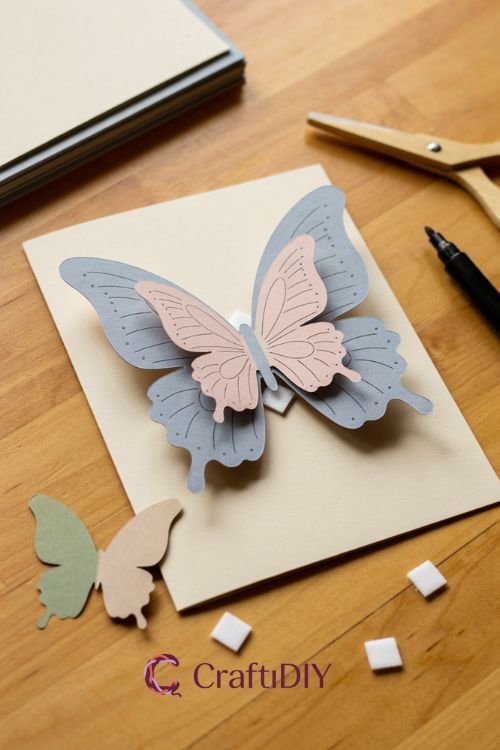
If flat cutouts feel a little plain, this idea gives you actual dimension — the wings lift off the page instead of lying flat.
What you’ll need:
- Two or three sheets of coordinating cardstock, cut into progressively smaller butterfly shapes
- Scissors
- Small foam adhesive squares (dimensional tape works too)
- Fine-tip marker for detail lines
Steps:
- Cut three butterfly shapes from your cardstock in decreasing sizes — think large, medium, small.
- Draw simple vein lines or dot patterns on each layer with your marker.
- Fold each butterfly slightly along the body line so the wings angle upward — not sharp, just a gentle lift.
- Stack the largest on the bottom, then attach the medium layer on top with a foam square in the center only.
- Repeat with the smallest layer on top.
- Press gently along the body to seat the foam squares, then let the wings spring back up on their own.
- Curl the wingtips slightly around a pencil for extra shape if you want it.
Watch out: if you use too much adhesive or spread it across the whole wing, the layers go flat and you lose the dimension — one small square in the center of the body is enough.
Quilled Butterflies
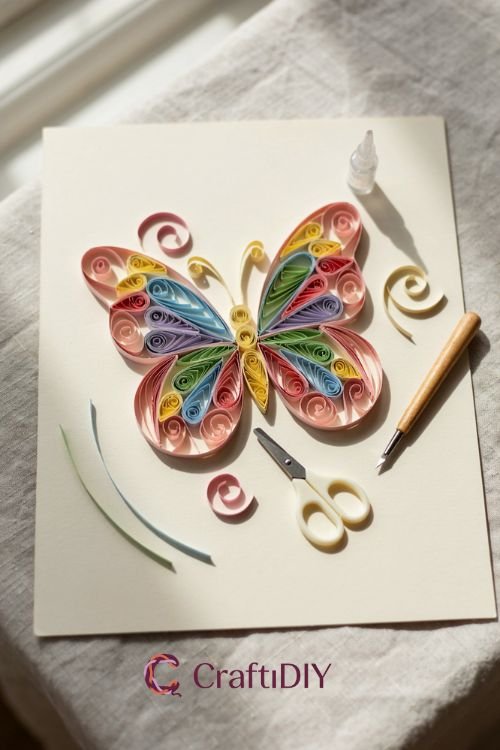
Quilling is its own little rabbit hole, and a butterfly is honestly one of the better places to start with it. You’re just coiling thin paper strips and gluing them into shapes — teardrops for the wings, tight coils for the body — then arranging them onto a backing card. It looks fussy from a distance but it’s really just repetition: coil, pinch, glue, place, repeat. Don’t rush the glue-drying between pieces or the whole thing shifts when you go to display it. This is the idea to try if you already like quilling or want an excuse to buy a slotted tool and some 1/8-inch strips.
Coffee Filter Butterflies

Kids’ craft table, rainy afternoon, this is the one. Coffee filters soak up color beautifully and the texture already looks a bit like real wing veining before you’ve done anything to it.
What you’ll need:
- White coffee filters
- Washable markers or liquid watercolor
- Spray bottle with water
- Pipe cleaner
- Clothespin (optional)
Steps:
- Color the coffee filter heavily with markers, or drip watercolor onto it — go bold, it’ll lighten when wet.
- Spritz with water and watch the colors spread and blend.
- Let it dry flat, which takes longer than you’d think — give it a good hour.
- Once dry, pinch the filter in the center and twist slightly.
- Wrap a pipe cleaner around the pinched center, twisting it tight to form the body and leaving two ends free for antennae.
- Fluff the wings out on either side.
- Bend the antennae ends into little curls.
That pinch-and-twist step is the only part that trips people up — it’ll look like a bowtie at first, and that’s exactly right, don’t panic.
Stained-Glass Tissue Paper Butterflies
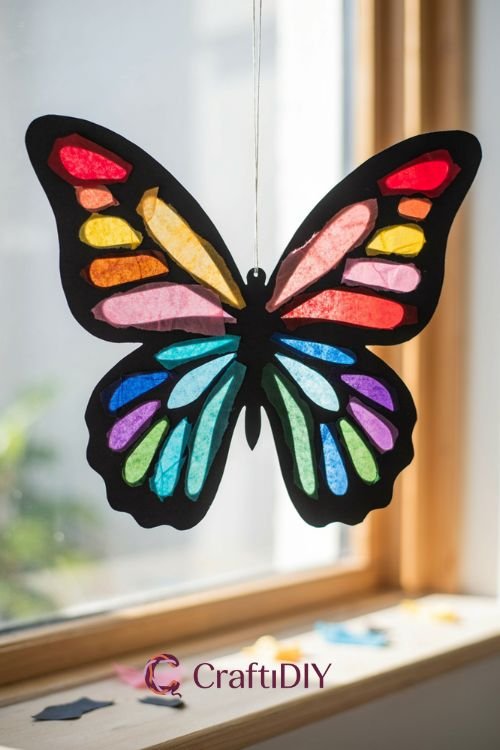
Cut a butterfly silhouette out of black cardstock, leaving just the outer outline and a few connecting “vein” lines — basically a stencil. Then glue small torn pieces of colored tissue paper behind the openings so light shows through them. Hang it near a window and it genuinely does the stained-glass thing, colors glowing when the sun hits it. It’s a bit fiddly cutting the stencil cleanly, not gonna lie, but the payoff is worth the extra ten minutes.
Pick whichever one matches the mood you’re in — some of these you can knock out in ten minutes, others are more of a sit-down-with-tea kind of project. Either way, once you’ve made a couple, tag me or leave a comment with how yours turned out. I’d love to see which colors you went with.
1 thought on “Paper Butterfly Crafts That Actually Look Like Butterflies (Not Folded Triangles)”